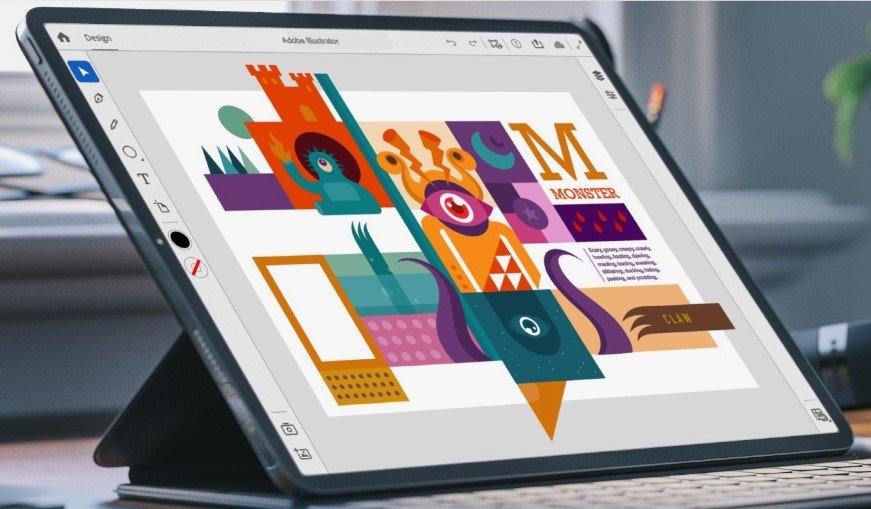
Adobe Illustrator is a versatile graphic design software used for creating vector-based illustrations and designs. It offers a wide range of tools and features for precision and creativity.
Adobe Illustrator is a powerful software for creating vector-based designs and illustrations. Its intuitive interface and comprehensive toolset make it a popular choice for graphic designers and artists. With Adobe Illustrator, users can create scalable graphics that maintain their quality at any size.
Whether for logos, icons, typography, or complex illustrations, Adobe Illustrator provides the tools needed to bring creative visions to life. The program’s accessibility and extensive online resources make it suitable for beginners and professionals alike. As a versatile tool, Adobe Illustrator continues to be a top choice in the graphic design industry.
Table of Contents

Getting Started With Adobe Illustrator
Adobe Illustrator is a powerful tool for creating stunning graphics and illustrations. If you’re new to the software, it can be overwhelming to know where to start. In this article, we’ll provide a beginner’s guide to getting started with Adobe Illustrator. We’ll cover system requirements, installation and setup, and an overview of the interface.
System Requirements
Before you begin using Adobe Illustrator, ensure that your computer meets the minimum system requirements. The software requires a 64-bit version of Windows 10 or macOS 10.13 or later. You’ll also need at least 8GB of RAM and 2GB of available storage space. For optimal performance, a multi-core processor is recommended.
Installation And Setup
After ensuring your computer meets the system requirements, you can download and install Adobe Illustrator. If you don’t have a subscription to Adobe Creative Cloud, you can sign up for one on their website. Once you’ve installed the software, you’ll need to set up your preferences and workspace. You can customize your workspace by rearranging and resizing panels to suit your needs.
Interface Overview
When you first open Adobe Illustrator, you’ll see the workspace with various panels and tools. The control bar at the top of the screen displays the current tool and provides quick access to common functions. The panels on the right side of the screen provide access to tools, layers, and other settings. The status bar at the bottom of the screen displays important information about your document, such as the current zoom level and color mode.
To create shapes in the artboard, you can use tools such as the pen tool and shape tools. The color panel and align panel allow you to customize the appearance of your shapes. The properties panel provides access to additional settings and options for your selected object. With these basic tools and panels, you can begin to create your illustrations and graphics.
There are many resources available online to help you learn more about Adobe Illustrator and its features. With practice and experimentation, you can become a skilled user and create stunning graphics and designs.
Creating And Editing Objects
Adobe Illustrator is a powerful tool for creating and editing objects in graphic design. In this blog post, we will explore the process of creating and editing objects in Adobe Illustrator.
Drawing Shapes
Drawing shapes in Adobe Illustrator allows you to create basic geometric forms like rectangles, circles, and polygons. You can use the shape tools to easily generate these shapes on the artboard.
Editing Paths
Editing paths involves manipulating the anchor points and handles of a path to adjust its shape. You can use tools like the Pen Tool to add, remove, or adjust anchor points to refine the path of an object.
Working With Layers
Working with layers in Adobe Illustrator enables you to organize and manage different elements of your design. Layers allow you to stack objects, control visibility, and apply effects independently to each layer.

Using Adobe Illustrator For Beginners
Adobe Illustrator is a powerful tool for graphic design. Whether you are a beginner or an experienced designer, mastering Adobe Illustrator can significantly enhance your design skills. In this article, we will explore the basics of using Adobe Illustrator for beginners, including adding text to your design, formatting text, and creating text effects. By the end of this article, you will have a good understanding of how to use Adobe Illustrator for graphic design.
Adding Text To Your Design
When using Adobe Illustrator for beginners, one of the essential skills to learn is adding text to your design. You can easily add text by selecting the Type tool and clicking on the artboard. This will create a text box where you can start typing your desired text. You can also import text from other sources, such as Adobe Illustrator tutorials or PDFs, to incorporate into your design.
Formatting Text
To enhance your design, it’s crucial to understand how to format text in Adobe Illustrator. You can change the font, size, color, and alignment of the text using the Character and Paragraph panels. Additionally, you can apply various text effects, such as bold, italic, underline, and more. Understanding these formatting options will allow you to create visually appealing designs using Adobe Illustrator for beginners.
Creating Text Effects
Once you have a good grasp of adding and formatting text, you can explore creating text effects in Adobe Illustrator. This includes applying shadows, gradients, outlines, and other visual enhancements to the text. By mastering text effects, you can elevate your designs and make them more engaging. Utilizing Adobe Illustrator tutorials, PDF can provide additional guidance in creating stunning text effects.
Using Color And Gradients
Using Adobe Illustrator to create stunning designs and graphics is an essential skill for designers and artists. This blog post will delve into the topic of Using Color and Gradients in Adobe Illustrator, offering valuable tips and techniques to enhance your design projects. Whether you are a beginner or an experienced user, mastering the use of color and gradients can elevate your work to the next level. Let’s explore the key aspects of using color and gradients in Adobe Illustrator.
Choosing Colors
When working on designs in Adobe Illustrator, choosing colors is a critical aspect. The color picker tool allows you to select from a vast range of hues, saturations, and brightness. Additionally, you can create custom color palettes and save them for future use. Utilizing color theory principles, such as complementary or analogous colors, can help in creating visually appealing designs. Adobe Illustrator tutorials on YouTube offer valuable insights into selecting and combining colors effectively.
Creating And Editing Gradients
Creating and editing gradients in Adobe Illustrator adds depth and dimension to your designs. You can apply linear, radial, or freeform gradients to objects, text, or shapes. Adjusting gradient stops, opacity, and angle allows for precise control over the gradient appearance. Furthermore, you can save custom gradients and apply them across multiple elements. YouTube tutorials on Adobe Illustrator provide step-by-step guidance on creating and modifying gradients to achieve desired visual effects.
Using Color Swatches
Using color swatches streamlines the color selection process in Adobe Illustrator. Swatches enable you to store and access frequently used colors, gradients, and patterns. By organizing swatches into libraries, you can maintain consistency across different projects. Importing and exporting swatch libraries facilitates seamless collaboration and sharing of color schemes. Learning how to effectively utilize color swatches can significantly enhance your workflow. Adobe Illustrator tutorials available on YouTube offer comprehensive instructions on managing and utilizing color swatches efficiently.
Working With Images
Using Adobe Illustrator for Working with Images allows you to unleash your creativity and create stunning visuals effortlessly.
Importing Images
When Importing Images into Adobe Illustrator, go to File > Place to insert an image into your project.
Editing Images In Illustrator
To Edit Images in Illustrator, use tools like Image Trace to convert raster images into editable vectors.
Tracing Images
Tracing Images in Illustrator involves converting a raster image into a vector format for scalability and editing flexibility.
Exporting And Saving Your Work
Adobe Illustrator tutorials on YouTube provide valuable insights into what is Adobe Illustrator used for. Taking an Adobe Illustrator course can enhance your skills in graphic design.

Exporting As Different File Types
When saving your work in Adobe Illustrator, you have the option to export as different file types such as JPEG, PNG, SVG, PDF, and more. Each file type serves a specific purpose based on where and how you intend to use the exported file.
Saving Your Work For Future Editing
To ensure future editing capabilities, it’s crucial to save your work in the native Adobe Illustrator format (.ai). This format preserves all layers, effects, and editable elements, allowing you to make changes to your project at any time without losing quality.
Advanced Techniques
Using Adobe Illustrator enables you to explore advanced techniques, allowing you to elevate your design skills to the next level. In this blog post, we will delve into working with brushes, creating custom shapes, and using the Pathfinder Tool to enhance your Illustrator proficiency.
Working With Brushes
When using Adobe Illustrator, working with brushes can add depth and texture to your designs. You can select from a variety of brush types, including calligraphic, scatter, art, and pattern brushes. Experimenting with brush settings such as size, shape, and pressure can further enhance your artwork.
Creating Custom Shapes
Creating custom shapes in Adobe Illustrator provides the flexibility to design unique and intricate graphics. Utilize the shape tools, such as the rectangle, ellipse, polygon, and star, to craft your desired shapes. Additionally, the pen tool allows for precise customization and manipulation of shapes.
Using The Pathfinder Tool
Using the Pathfinder Tool in Adobe Illustrator empowers you to merge, divide, and intersect shapes, enabling the creation of complex and seamless compositions. By employing Pathfinder operations like Unite, Minus Front, Intersect, and Exclude, you can achieve intricate designs and visual effects.
Conclusion
Adobe Illustrator is a user-friendly tool with a gentle learning curve, perfect for beginners. With a plethora of online tutorials and an intuitive interface, mastering Illustrator is within reach. Whether creating vector graphics or honing design skills, Illustrator proves to be a versatile and valuable piece of software for all levels.

